
Data Mavericks
YOLOX custom.ver 모델 학습 본문
실습환경
운영 체제 : Ubuntu 20.04 ( Linux )
NVIDIA GPU Driver Version: 525.125.06
CUDA Version: 12.0
주의사항
YOLOX는 GPU를 사용할 경우 운영체제는 WIndow와 Linux만 지원합니다
NVIDIA, CUDA, cuDNN등 설치 하시기 바랍니다.
torch만 따로 설치를 완료하였다면 아래 명령어로 빌드해주세요.$ cd YOLOX $ pip3 install -v -e . # or python3 setup.py develop
tensorRT 설치

아래 명령어를 터미널 창에 실행하여 CUDA버전과 Ubuntu버전을 확인 후 버전에 맞는 TAR Package파일 설치
$ nvidia-smilsb_release -a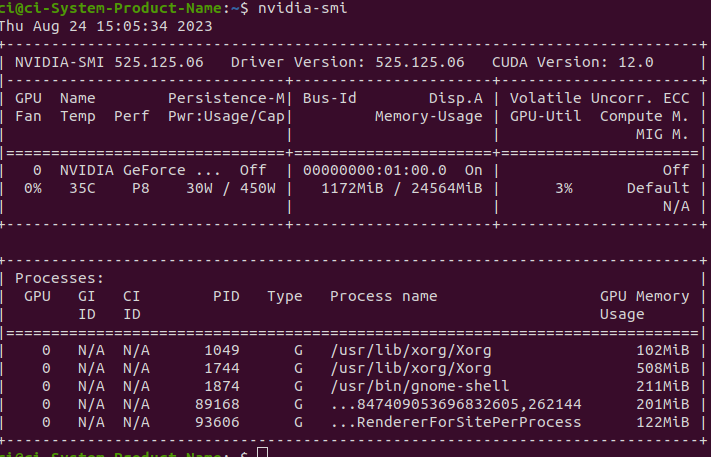


(TEnsorRT 8.6 GA에 라이언이 빵댕이 흔들고 있는 부분이 버전에 맞는 퍀)
나는 이미 깔려있어서 설명은 생략하겠다.
https://github.com/Megvii-BaseDetection/YOLOX
GitHub - Megvii-BaseDetection/YOLOX: YOLOX is a high-performance anchor-free YOLO, exceeding yolov3~v5 with MegEngine, ONNX, Ten
YOLOX is a high-performance anchor-free YOLO, exceeding yolov3~v5 with MegEngine, ONNX, TensorRT, ncnn, and OpenVINO supported. Documentation: https://yolox.readthedocs.io/ - GitHub - Megvii-BaseDe...
github.com
터미털 창에 위 사이트를 클론 합니다.
$ git clone "https://github.com/Megvii-BaseDetection/YOLOX"
사전 학습 모델 파일을 수동으로 직접 설치하여야 한다. 설치하면 평소에 보던 pt가 아닌 pth라는 파일을 다운 받게 된다.

터미널 창에 아래 명령어를 실행하여 기본 사진인 dog.jpg에 대해 coco 모델 test를 한다.
$ python tools/demo.py image -n yolox-s -c ./yolox_s.pth --path assets/dog.jpg --conf 0.25 --nms 0.45 --tsize 640 --save_result --device gpu실행한다면 YOLOX/YOLOX_outputs/yolox_s/vis_res/.. 실행 시간의 이름을 가진 폴더로 저장되어있는걸 확인 할 수 있다.
찾아간다면..

데이터셋 만들기
YOLOX에 필요한 데이터를 만들기 위해서는 평소에 사용하던 방법을 json 파일로 만들어 주는것이 필요하다.
https://data-mavericks.tistory.com/6
[Yolo mark 사용법] Yolo mark로 라벨링 데이터 생성 + coco 형식으로 전환 (egg.1)
개발환경 linux ubuntu 20.04 Yolo mark 설치 https://github.com/AlexeyAB/Yolo_mark\ GitHub - AlexeyAB/Yolo_mark: GUI for marking bounded boxes of objects in images for training neural network Yolo v3 and v2 GUI for marking bounded boxes of objects in i
data-mavericks.tistory.com
에서 만든 데이터를
https://github.com/Taeyoung96/Yolo-to-COCO-format-converter/
GitHub - Taeyoung96/Yolo-to-COCO-format-converter: Yolo to COCO annotation format converter
Yolo to COCO annotation format converter. Contribute to Taeyoung96/Yolo-to-COCO-format-converter development by creating an account on GitHub.
github.com
를 이용하여 json파일로 만들어 주어야한다.
$ git clone "https://github.com/Taeyoung96/Yolo-to-COCO-format-converter"를 터미널 창에 작성하여 클론해주면
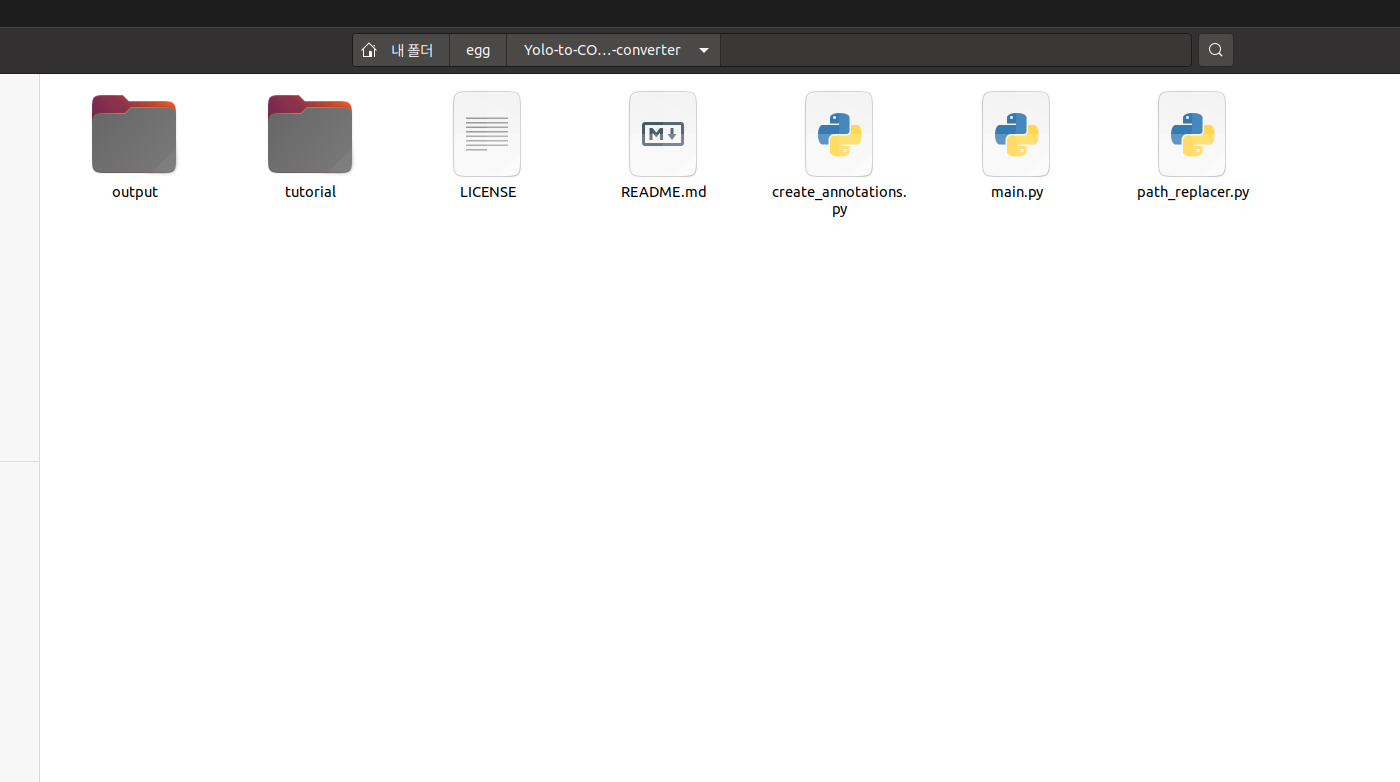
7개의 파일이 있는데 이 중 main.py의 코드를 수정해준다.

classes 부분을 자신의 클래스에 맞게 수정해준다.
from pathlib import Path

from create_annotations import (
    create_image_annotation,
    create_annotation_from_yolo_format,
    coco_format,
)
import cv2
import argparse
import json
import numpy as np
import imagesize

#################################################
# Change the classes depend on your own dataset.#
# Don't change the list name 'Classes'          #
#################################################

YOLO_DARKNET_SUB_DIR = "YOLO_darknet"

classes = [
    "egg",
    "friedegg",
    "boiledegg"
]


def get_images_info_and_annotations(opt):
    path = Path(opt.path)
    annotations = []
    images_annotations = []
    if path.is_dir():
        file_paths = sorted(path.rglob("*.jpg"))
        file_paths += sorted(path.rglob("*.jpeg"))
        file_paths += sorted(path.rglob("*.png"))
    else:
        with open(path, "r") as fp:
            read_lines = fp.readlines()
        file_paths = [Path(line.replace("\n", "")) for line in read_lines]

    image_id = 0
    annotation_id = 1  # In COCO dataset format, you must start annotation id with '1'

    for file_path in file_paths:
        # Check how many items have progressed
        print("\rProcessing " + str(image_id) + " ...", end='')

        # Build image annotation, known the image's width and height
        w, h = imagesize.get(str(file_path))
        image_annotation = create_image_annotation(
            file_path=file_path, width=w, height=h, image_id=image_id
        )
        images_annotations.append(image_annotation)

        label_file_name = f"{file_path.stem}.txt"
        if opt.yolo_subdir:
            annotations_path = file_path.parent / YOLO_DARKNET_SUB_DIR / label_file_name
        else:
            annotations_path = file_path.parent / label_file_name

        if not annotations_path.exists():
            continue  # The image may not have any applicable annotation txt file.

        with open(str(annotations_path), "r") as label_file:
            label_read_line = label_file.readlines()

        # yolo format - (class_id, x_center, y_center, width, height)
        # coco format - (annotation_id, x_upper_left, y_upper_left, width, height)
        for line1 in label_read_line:
            label_line = line1
            category_id = (
                int(label_line.split()[0]) + 1
            )  # you start with annotation id with '1'
            x_center = float(label_line.split()[1])
            y_center = float(label_line.split()[2])
            width = float(label_line.split()[3])
            height = float(label_line.split()[4])

            float_x_center = w * x_center
            float_y_center = h * y_center
            float_width = w * width
            float_height = h * height

            min_x = int(float_x_center - float_width / 2)
            min_y = int(float_y_center - float_height / 2)
            width = int(float_width)
            height = int(float_height)

            annotation = create_annotation_from_yolo_format(
                min_x,
                min_y,
                width,
                height,
                image_id,
                category_id,
                annotation_id,
                segmentation=opt.box2seg,
            )
            annotations.append(annotation)
            annotation_id += 1

        image_id += 1  # if you finished annotation work, updates the image id.

    return images_annotations, annotations


def debug(opt):
    path = opt.path
    color_list = np.random.randint(low=0, high=256, size=(len(classes), 3)).tolist()

    # read the file
    file = open(path, "r")
    read_lines = file.readlines()
    file.close()

    for line in read_lines:
        print("Image Path : ", line)
        # read image file
        img_file = cv2.imread(line[:-1])

        # read .txt file
        label_path = line[:-4] + "txt"
        label_file = open(label_path, "r")
        label_read_line = label_file.readlines()
        label_file.close()

        for line1 in label_read_line:
            label_line = line1

            category_id = label_line.split()[0]
            x_center = float(label_line.split()[1])
            y_center = float(label_line.split()[2])
            width = float(label_line.split()[3])
            height = float(label_line.split()[4])

            int_x_center = int(img_file.shape[1] * x_center)
            int_y_center = int(img_file.shape[0] * y_center)
            int_width = int(img_file.shape[1] * width)
            int_height = int(img_file.shape[0] * height)

            min_x = int_x_center - int_width / 2
            min_y = int_y_center - int_height / 2
            width = int(img_file.shape[1] * width)
            height = int(img_file.shape[0] * height)

            print("class name :", classes[int(category_id)])
            print("x_upper_left : ", min_x, "\t", "y_upper_left : ", min_y)
            print("width : ", width, "\t", "\t", "height : ", height)
            print()

            # Draw bounding box
            cv2.rectangle(
                img_file,
                (int(int_x_center - int_width / 2), int(int_y_center - int_height / 2)),
                (int(int_x_center + int_width / 2), int(int_y_center + int_height / 2)),
                color_list[int(category_id)],
                3,
            )

        cv2.imshow(line, img_file)
        delay = cv2.waitKeyEx()

        # If you press ESC, exit
        if delay == 27 or delay == 113:
            break

        cv2.destroyAllWindows()


def get_args():
    parser = argparse.ArgumentParser("Yolo format annotations to COCO dataset format")
    parser.add_argument(
        "-p",
        "--path",
        type=str,
        help="Absolute path for 'train.txt' or 'test.txt', or the root dir for images.",
    )
    parser.add_argument(
        "--debug",
        action="store_true",
        help="Visualize bounding box and print annotation information",
    )
    parser.add_argument(
        "--output",
        default="train_coco.json",
        type=str,
        help="Name the output json file",
    )
    parser.add_argument(
        "--yolo-subdir",
        action="store_true",
        help="Annotations are stored in a subdir not side by side with images.",
    )
    parser.add_argument(
        "--box2seg",
        action="store_true",
        help="Coco segmentation will be populated with a polygon "
        "that matches replicates the bounding box data.",
    )
    args = parser.parse_args()
    return args


def main(opt):
    output_name = opt.output
    output_path = "output/" + output_name

    print("Start!")

    if opt.debug is True:
        debug(opt)
        print("Debug Finished!")
    else:
        (
            coco_format["images"],
            coco_format["annotations"],
        ) = get_images_info_and_annotations(opt)

        for index, label in enumerate(classes):
            categories = {
                "supercategory": "Defect",
                "id": index + 1,  # ID starts with '1' .
                "name": label,
            }
            coco_format["categories"].append(categories)

        with open(output_path, "w") as outfile:
            json.dump(coco_format, outfile, indent=4)

        print("Finished!")


if __name__ == "__main__":
    options = get_args()
    main(options)
(main.py의 코드)
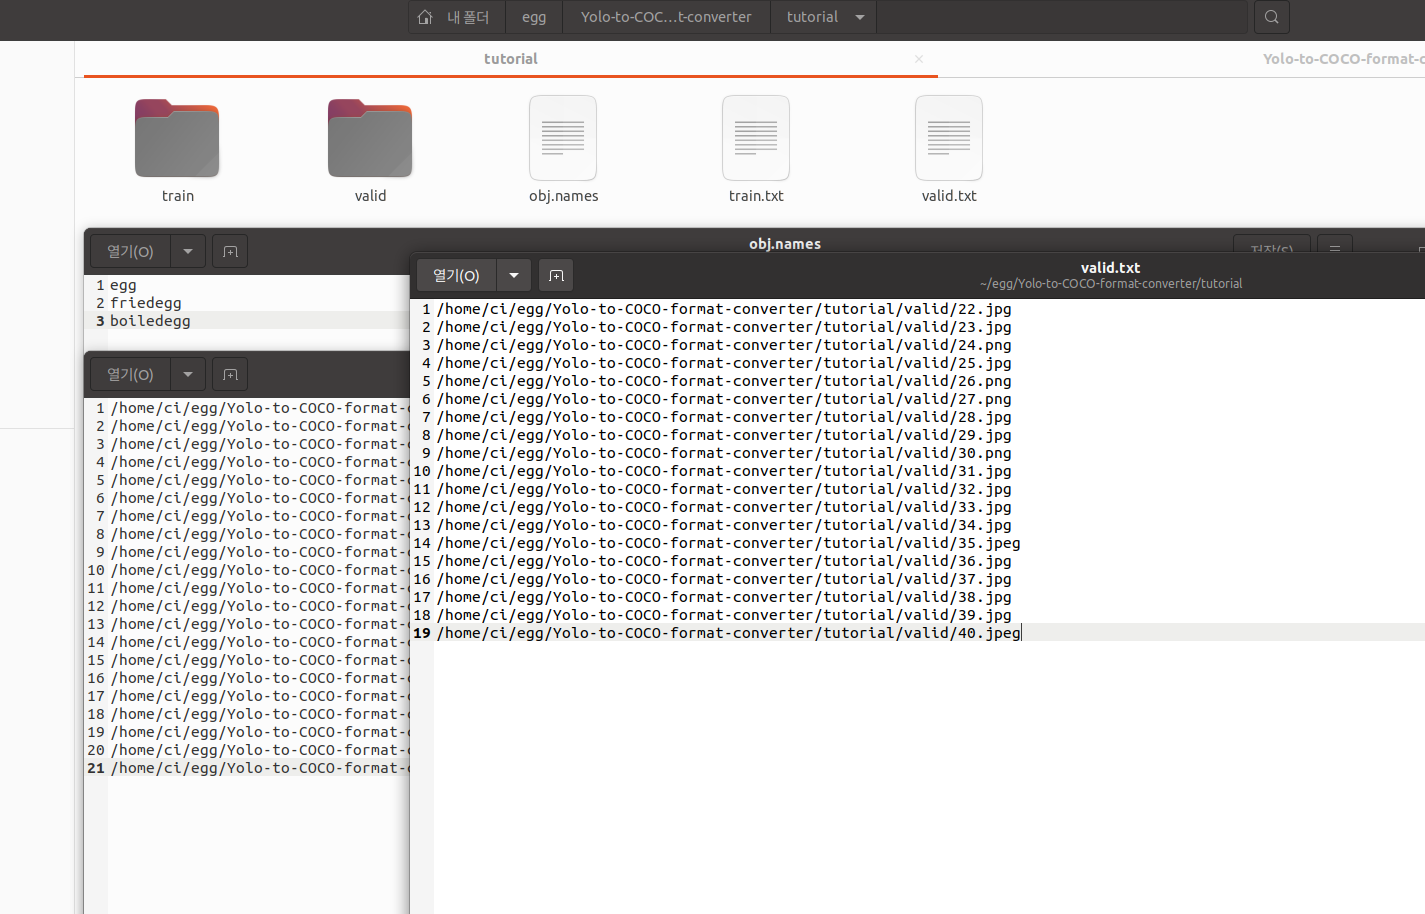
그 다음 tutorial폴더로 이동한 후 train 폴더에는 사진과 주석(txt)를 넣어주고
obj.names에는 우리가 필요로하는 클래스 이름을 수정해주고 train.txt에는 폴더내 파일 경로를 저장해준다.
valid도 사진과 주석 사용
path_replacer.py를 이용하면 txt를 일괄 변경 할 수 있는데 git에 나와있는거 처럼

에 맞게 수정해서 사용하면 된다.
나 같은 경우는
python3 path_replacer.py --path_image_folder /home/ci/egg/Yolo-to-COCO-format-converter/tutorial/train --path_txt /home/ci/egg/Yolo-to-COCO-format-converter/tutorial/train.txt

python3 path_replacer.py --path_image_folder /home/ci/egg/Yolo-to-COCO-format-converter/tutorial/valid --path_txt /home/ci/egg/Yolo-to-COCO-format-converter/tutorial/valid.txt
cd를 이용해서 해당 path에서 입력하는건 잊지말자

txt파일의 모든 내용이 변경되었고 경로를 재지정 했다면 이미지 변환을 시작
python main.py --path <Absolute Path of train.txt> --output <Name of the json file>나에게 맞게 작성하면
python3 main.py --path /home/ci/egg/Yolo-to-COCO-format-converter/tutorial/train/ --output instances_train2017.json

python3 main.py --path /home/ci/egg/Yolo-to-COCO-format-converter/tutorial/valid/ --output instances_val2017.json
json file 이름은 저걸로 고정 해주자. 이유는 아래에 자세하게 설명하겠다.

이제 COCO라는 폴더를 만들고 2개의 폴더를 만든다.
annotations : json 파일 (위 명령어 대로 하면 output에 train2017.json으로 저장되어있음)
train2017 : 사진, 주석X(txt파일 필요X)val2017 : 사진, 주석X(txt파일 필요X)

이것으로 데이터셋 준비는 끝
학습에 활용
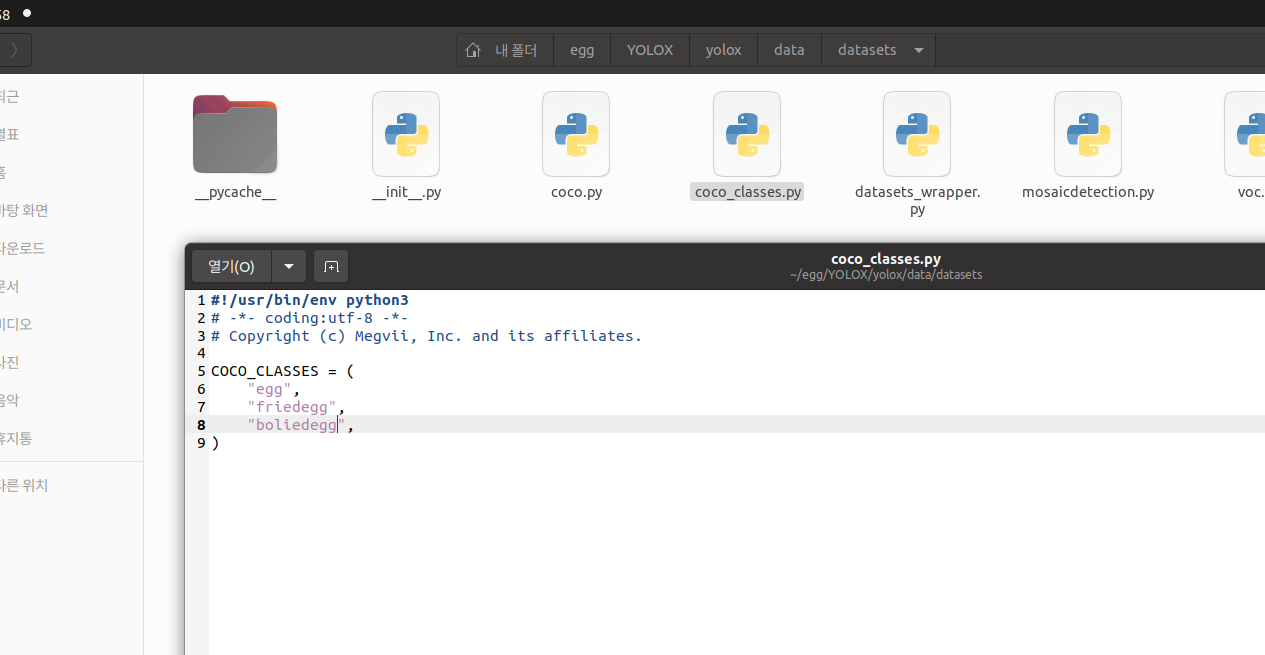
YOLOX/yolox/data/datasets/coco_classes.py 파일을 열어 자신에게 맞는 class를 수정해준다.
위에서 만든 데이터파일(COCO폴더)를 YOLOX/datasets/에 둔다.
그 후 명령어로 학습시작
python3 tools/train.py -f exps/default/yolox_s.py -d 1 -b 16 --fp16 -c ./yolox_s.pth-d : gpu 디바이스의 수. 장착된 gpu가 n개일 경우 1대신 n을 적어 더 빠른 학습
-b : 배치사이즈
--fp16 : yolov4의 cuDNN half 와 같다. 플로팅포인트32비트를 16비트로 바꿔 학습 속도 증가
-c : 전이학습 할 파일의 경로

...

...

학습이 완료 되었고 확인해보자
tensorboard --logdir=/actual/path/to/YOLOX_outputs/yolox_x/tensorboard를 터미널 창에 입력하면 된다.
나에게 맞추어 입력하자면
tensorboard --logdir=/home/ci/egg/YOLOX/YOLOX_outputs/yolox_s/tensorboard
아래에 주소를 반환하게 되는데 이 링크를 연다면

확인 가능하고 다른 사진으로 test 를 해보고 싶다면
python tools/demo.py image -n yolox-s -c /path/to/your/checkpoint_file.pth --path /path/to/your/test_image.jpg --conf 0.3 --nms 0.65 --tsize 640 --save_result나에게 맞춰 입력( COCO파일에 test 사진 추가해주었다)
python3 tools/demo.py image -n yolox-s -c /home/ci/egg/YOLOX/YOLOX_outputs/yolox_s/best_ckpt.pth --path /home/ci/egg/YOLOX/datasets/COCO/test --conf 0.3 --nms 0.65 --tsize 640 --save_result
/home/ci/egg/YOLOX/YOLOX_outputs/yolox_s/vis_res/시간/ 으로 가면 결과 값을 확인할 수 있다.


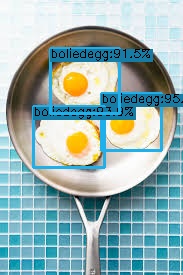
데이터 양이 적어서 제대로 안된거 같지만 성공적(train data가 20장)
'CI' 카테고리의 다른 글
| YOLOv5 custom.ver 모델 학습 (0) | 2023.08.24 |
|---|---|
| [YOLOv7 사용법] YOLOv7 Custom.ver 설치&실행 (egg.2) (0) | 2023.07.13 |
| [Yolo mark 사용법] Yolo mark로 라벨링 데이터 생성 + coco 형식으로 전환 (egg.1) (0) | 2023.07.13 |


